You’ve spent real time and money decorating your home, yet something still feels off. The walls look bare, the furniture feels generic, and the whole space lacks a personal signature. You’re not alone in this frustration. The good news is that diamond painting solves two problems at once: it gives you a genuinely therapeutic creative practice and produces stunning, display-ready artwork that transforms interiors from forgettable to intentional. This guide walks you through every stage, from foundational design principles to professional framing and thoughtful layering, so your home finally reflects who you are.
Table of Contents
- Understanding the principles of artful interiors
- Gathering your materials: Tools and diamond art essentials
- Creating and layering diamond art for visual impact
- Displaying and framing your diamond paintings
- Mixing diamond art with other decor for harmonious, layered interiors
- Why mindful, layered interiors matter more than ever
- Ready to make your interiors artful?
- Frequently asked questions
Key Takeaways
| Point | Details |
|---|---|
| Layer with intent | Blend textures, colors, and scales—including diamond art—for deeper, more meaningful interiors. |
| Mindful creation adds value | Diamond painting fuses therapeutic creativity with display-worthy decor for personalized spaces. |
| Display for maximum impact | Frame and mount diamond paintings thoughtfully to preserve sparkle and blend with your style. |
| Mix high and low | Balance investment pieces with artistic, affordable finds for approachable luxury. |
Understanding the principles of artful interiors
What separates a room that feels curated from one that just feels furnished? The answer lies in three core principles: depth, balance, and contrast. Depth means your eye has multiple layers to travel through, from a textured rug on the floor to a bold painting on the wall to a sculptural lamp in the corner. Balance doesn’t mean symmetry; it means visual weight is distributed so no single corner screams for attention while another whispers. Contrast keeps things interesting, pairing rough with smooth, matte with glossy, quiet neutrals with one saturated pop of color.
Intentional layering builds depth through textures, colors, materials, and scales working together rather than competing. Diamond painting fits naturally into this framework because it introduces a unique material quality: thousands of tiny resin facets that catch light differently throughout the day, creating a living texture no printed canvas can replicate.
Core principles for artful interiors:
- Layering: Combine objects at different heights and depths, from floor to ceiling
- Color proportion: Use the 60-30-10 rule to maintain visual harmony
- Texture mixing: Pair smooth surfaces with tactile ones for sensory richness
- Scale variation: Mix large statement pieces with smaller supporting elements
- Personal meaning: Include objects that tell your story, not just fill space
The 60-30-10 rule for mixing art styles suggests that 60% of your room’s visual identity comes from a dominant style or palette, 30% from a complementary one, and 10% from an accent. Your diamond painting can serve any of these roles depending on its scale and palette. A large, jewel-toned floral piece might anchor the dominant 60%, while a smaller geometric design adds the punchy 10% accent.

| Feature | Traditional art | Diamond painting |
|---|---|---|
| Texture | Flat or brushed | 3D faceted sparkle |
| Personalization | Purchased as-is | Made by your hands |
| Therapeutic value | Passive enjoyment | Active, mindful creation |
| Light interaction | Static | Dynamic, shifts with light |
| Cost | Often high for originals | Accessible at any budget |
| Display readiness | Frame and hang | Finish, frame, and hang |
Pro Tip: Start with a neutral backdrop, think warm white or soft greige walls, and let a bold diamond painting carry the focal energy. The neutrals give the sparkle room to breathe.
For diamond art kit inspiration, think about the existing palette in your room before choosing a design. A kit that mirrors two or three colors already present in your space will integrate seamlessly rather than clashing.
Gathering your materials: Tools and diamond art essentials
With the foundations in mind, your next step is gathering the right materials. The quality of your tools directly affects both the process and the final result. Rushing this stage with mismatched or low-quality supplies leads to frustration mid-project and a finished piece that doesn’t live up to your vision.
Key materials checklist:
- A high-quality diamond painting kit with pre-printed adhesive canvas
- A multi-placer or single-tip applicator pen
- Wax or gel for picking up individual drills
- A sorting tray for organizing diamond colors
- A light pad for improved visibility on detailed sections
- Framing options: magnetic, wooden float frame, or stretcher bars
- Optional: sealing spray or brush-on sealant for longevity
| Tool | Purpose | Best practice tip |
|---|---|---|
| Applicator pen | Picks up and places drills | Use multi-tip for large fill areas |
| Light pad | Illuminates canvas symbols | Essential for dark or detailed designs |
| Sorting tray | Organizes drills by color code | Work one color at a time |
| Wax pad | Helps pen grip each drill | Replace wax when pickup weakens |
| Roller tool | Seals drills into adhesive | Roll gently after completing sections |
| Tweezers | Corrects misplaced drills | Keep nearby for precision fixes |
Color selection is where your interior design eye matters most. When you browse kits, don’t just fall in love with the image. Look at the dominant hues and ask whether they echo something already in your room, a cushion color, a rug tone, a favorite ceramic piece. Diamond painting adds a mindful, therapeutic element to creating personal art for interiors, providing sparkle and texture that enhances layering in ways mass-produced prints simply cannot.
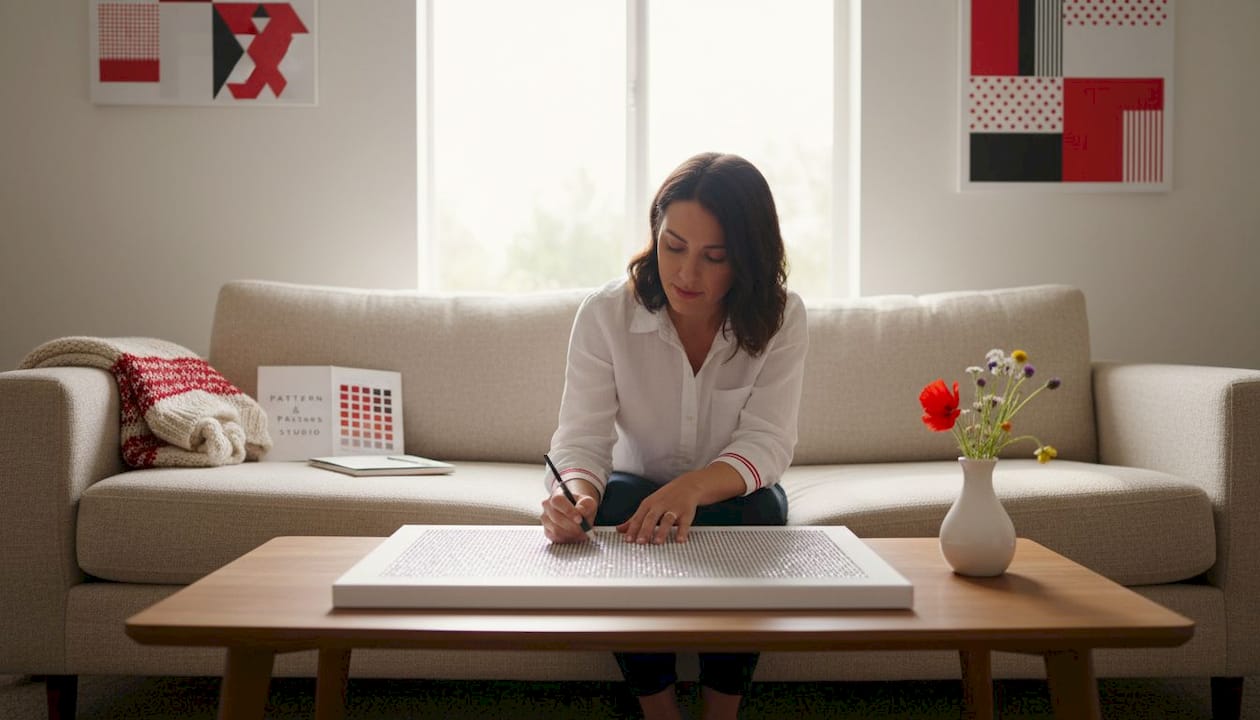
The tactile engagement of placing each tiny drill is not a side benefit; it’s central to why this practice works so well for design-conscious adults. You spend hours with the piece before it ever touches your wall. That intimacy shows in the final result. You notice details, make small adjustments, and develop a genuine relationship with the artwork. When it finally hangs in your home, it carries meaning that no store-bought print can replicate.
Visit the diamond art supply shop to explore kits organized by theme, size, and color palette, making it easier to find pieces that align with your existing decor scheme.
Creating and layering diamond art for visual impact
Once you have your tools, you’re ready to create art that anchors and enriches your spaces. The creation process itself is where design intention meets hands-on craft.
Step-by-step creation process:
- Unroll and flatten your canvas for at least 30 minutes under heavy books before starting
- Review the color chart and sort all drills into labeled compartments before placing a single one
- Start from the top or center and work outward to avoid smudging completed sections
- Work one color at a time across the full canvas rather than completing small patches
- Use a light pad for any sections with dense symbol overlap or dark background colors
- Roll completed sections with a brayer or rolling pin to press drills firmly into adhesive
- Inspect under raking light before sealing to catch any gaps or misaligned drills
The 60-30-10 rule applies directly to how you choose which piece to create for a specific room. If your living room already has a dominant warm earthy palette, a floral diamond art kit in coral and teal could serve as that 10% accent punch. For a more dramatic statement, an Art Nouveau portrait kit with rich golds and greens could anchor the dominant 60%.
The emotional case for handmade art: Research consistently shows that displaying objects you created yourself increases feelings of pride, ownership, and wellbeing in a space. Your diamond painting isn’t just decoration; it’s a daily reminder of your own capability and patience.
Texture contrast is where diamond painting truly earns its place in a layered interior. The faceted surface of finished diamond art catches and scatters light in a way that changes from morning to evening. Place it near a window and it glimmers softly in natural light. Add a directional lamp and it becomes almost luminous at night. No flat print achieves this.

Pro Tip: After hanging your diamond painting, place one or two adjacent accents that echo its palette. A textured throw pillow in the same coral as your floral piece, or a brass lamp that picks up the gold tones in a portrait kit, ties the artwork into the room rather than leaving it isolated on the wall.
Displaying and framing your diamond paintings
After creating your artwork, it’s time to showcase it so it becomes an integral part of your interior. How you frame and mount diamond art makes an enormous difference to both its visual impact and its longevity.
The single most important rule: frame diamond art without glass to preserve its sparkle. Glass flattens the 3D effect that makes diamond painting so visually distinctive. It also creates glare that obscures the faceted surface. The whole point of those thousands of tiny resin drills is their ability to catch light from multiple angles, and glass eliminates that entirely.
Best framing options for diamond art:
- Magnetic frames: Easy to use, no tools required, clean modern look
- Wooden float frames: Elevate the piece visually, add warmth and depth
- Stretcher bars: Wrap the canvas tightly for a gallery-style presentation
- No-glass shadow box frames: Add depth while protecting the surface
- Optional sealing: Brush-on or spray sealant before framing for extra drill security
For diamond art tools that help with finishing and precision work before framing, having the right pen and wax on hand lets you make final adjustments after the rolling stage.
“Mount larger diamond paintings with D-rings or French cleats for secure, level hanging that distributes weight evenly across the wall.” — How to frame diamond art
Mounting matters as much as framing. For pieces under 30 cm, standard picture hooks work fine. For anything larger, D-rings attached to the back of the frame and a corresponding wall anchor give you the stability you need. French cleats, a two-piece interlocking bracket system, are ideal for very large pieces because they distribute weight across a wider wall area and allow for easy repositioning.
Lighting your framed diamond art is the final step most people skip. A small picture light mounted above the frame or a directional track light aimed at the piece transforms it after dark. The angled light hits the facets and creates a shimmer effect that makes the artwork feel alive. This is the difference between art that disappears at night and art that becomes a room’s defining feature.
Mixing diamond art with other decor for harmonious, layered interiors
With your art professionally displayed, integrate it into your overall design scheme for maximum visual delight. The goal is cohesion without matching, personality without clutter.
The high-low approach to home decor pairs high-end investment pieces with affordable or vintage finds for a balanced, livable sense of luxury. Diamond painting fits perfectly into this strategy as the affordable, handmade anchor that holds its own next to more expensive furnishings.
High-low mixing ideas for diamond art interiors:
- Hang a large diamond painting above a vintage mid-century credenza
- Pair a sparkly botanical piece with a high-end linen sofa in a complementary tone
- Group a small diamond art piece with thrifted ceramic vessels and a quality brass lamp
- Use a coastal diamond art kit alongside natural rattan furniture for a relaxed, layered coastal look
- Mix a jewel-toned diamond portrait with minimalist Scandinavian furniture for dramatic contrast
A shared color palette is the invisible thread that makes mixing work. Pull two or three colors from your diamond painting and repeat them in small doses throughout the room. A teal in your floral piece reappears in a stack of books on a shelf. The coral echoes in a single throw pillow. These repetitions create visual rhythm without feeling forced or matchy-matchy.
Pro Tip: Choose one bold, sparkly diamond painting as the room’s focal point and let everything else support it. Echo its two dominant colors in surrounding accents at a smaller scale. This gives the room a clear visual hierarchy and prevents the layered look from tipping into chaos.
Why mindful, layered interiors matter more than ever
Here’s a perspective worth sitting with: the design industry constantly pushes fast, trend-driven solutions. A new color of the year, a viral shelf styling trend, a collection that’s everywhere for one season and dated the next. Most of us have fallen for it at least once, and the result is a home that looks assembled rather than lived in.
Mindful creation changes that equation entirely. When you spend hours placing each drill in a diamond painting, you’re not just making art. You’re practicing sustained attention, a skill that modern life actively erodes. The finished piece carries that energy. It’s not something you ordered and unwrapped; it’s something you made, and that distinction is visible in a way that’s hard to articulate but immediately felt by anyone who enters the room.
Layered, personalized interiors built around handmade pieces stand apart from spaces decorated by formula. They age better, feel more authentic, and serve your wellbeing in ways that a perfectly curated but impersonal room never can. Explore mindful art resources that support this approach to creative, intentional living. The therapeutic value of the process and the visual value of the result are inseparable, and that combination is worth pursuing deliberately.
Ready to make your interiors artful?
Inspired by the process and possibilities? Here’s where you can take your next step.

At Pattern & Prisms Studio, every kit is selected with design-conscious adults in mind. Whether you’re drawn to bold botanicals, coastal scenes, or richly detailed portraits, the curated collection makes it easy to find a piece that speaks to your space and your style. Start with a botanical diamond painting kit if you want something that layers beautifully into almost any interior palette. Pair it with the studio’s finishing tools and framing guidance, and you’ll have a display-ready artwork that genuinely elevates your home.
Frequently asked questions
Should I use glass when framing diamond art for my interior?
No. Experts advise against glass for diamond art framing because it flattens the 3D sparkle and creates glare that obscures the faceted surface effect that makes diamond painting so visually distinctive.
How does diamond painting enhance layering in home decor?
Diamond painting introduces a unique tactile and reflective surface that flat prints cannot replicate, and its sparkle and texture enhance layering by adding a dynamic, light-catching element to any interior arrangement.
What is the 60-30-10 rule for mixing art styles in one room?
The 60-30-10 rule means allocating 60% of your room’s visual identity to a dominant style, 30% to a complementary one, and 10% to an accent, unified by a consistent color palette or frame style.
What is a high-low approach in artful interiors?
It means pairing high-end investment pieces with affordable or vintage finds to create a balanced, approachable sense of luxury that feels personal rather than showroom-perfect.
How do I securely mount large diamond paintings?
Use D-rings or French cleats attached to the back of your frame for stable, level hanging that distributes the weight of larger pieces evenly across the wall.
Recommended
- Pattern & Prisms studio
- Garden Watering Can Diamond Painting Kit | 5D Full Drill Diamond Art – Pattern & Prisms studio
- Love Cat 5D DIY Diamond Painting Kits for Adults, Full Drill Dot Painting Gem Art – Pattern & Prisms studio
- Sky Blue 3pcs/set Diamond Painting Alignment Tool Set – Pattern & Prisms studio
Leave a Reply